
It’s no surprise that Shopify is the most popular platform for creating online stores as well as websites. Moreover, everyone loves Shopify, but sometimes we need to tailor the platform according to our requirements and needs.
One important need is creating so-called sub-collections. They are used to organize site structure in such a way that child collections are nested in parent collections. These child collections are referred to as sub-collections.
In this article we focus on how to achieve the above and take a look at several ways to create sub-collections in our site.
Creating Collections is probably your first step in jazzing it up. And what is a Collection in Shopify? Collections make the shopping experience for your customers clearer and more seamless. In today’s article, we are going to discuss how to create Shopify sub-collections, as well as collections.
The first thing I should mention is that Shopify doesn’t allow the creation of sub-collections with 3rd level URL structures.
1st nesting level – https://your-store.myshopify.com/collections
2nd nesting level – https://your-store.myshopify.com/collections/your-collection
Both the parent and child collections will have the same nesting levels. This means that they will be viewed as equal site pages by search engines.
When you use Shopify there is no simple way to create sub-collections with the following URL structure: https://your-store.myshopify.com/collections/main-collection/sub-collection
In theory there is a way to do this, but it’s far from easy. To get this type of sub-collection, you will need to make serious changes to the code and structure of the site. If you are completely sure that you need this, we recommend contacting Shopify experts. Our SpurIT experts also have completed such tasks and successfully implemented the required site structure in client projects.
However, in this article we intend to provide valuable information to average users. For this reason, you will find several ways to create sub-collections below in the easiest ways possible. These methods are suitable for the majority of sites.
Creation of Sub Collections through the Navigation Menu
Let’s start with the most simple and obvious way to create sub-collections. You can change the structure of your site and its visual appearance using the admin panel. This can be done in the ‘Navigation’ section.
To make the changes, you should take the following steps:
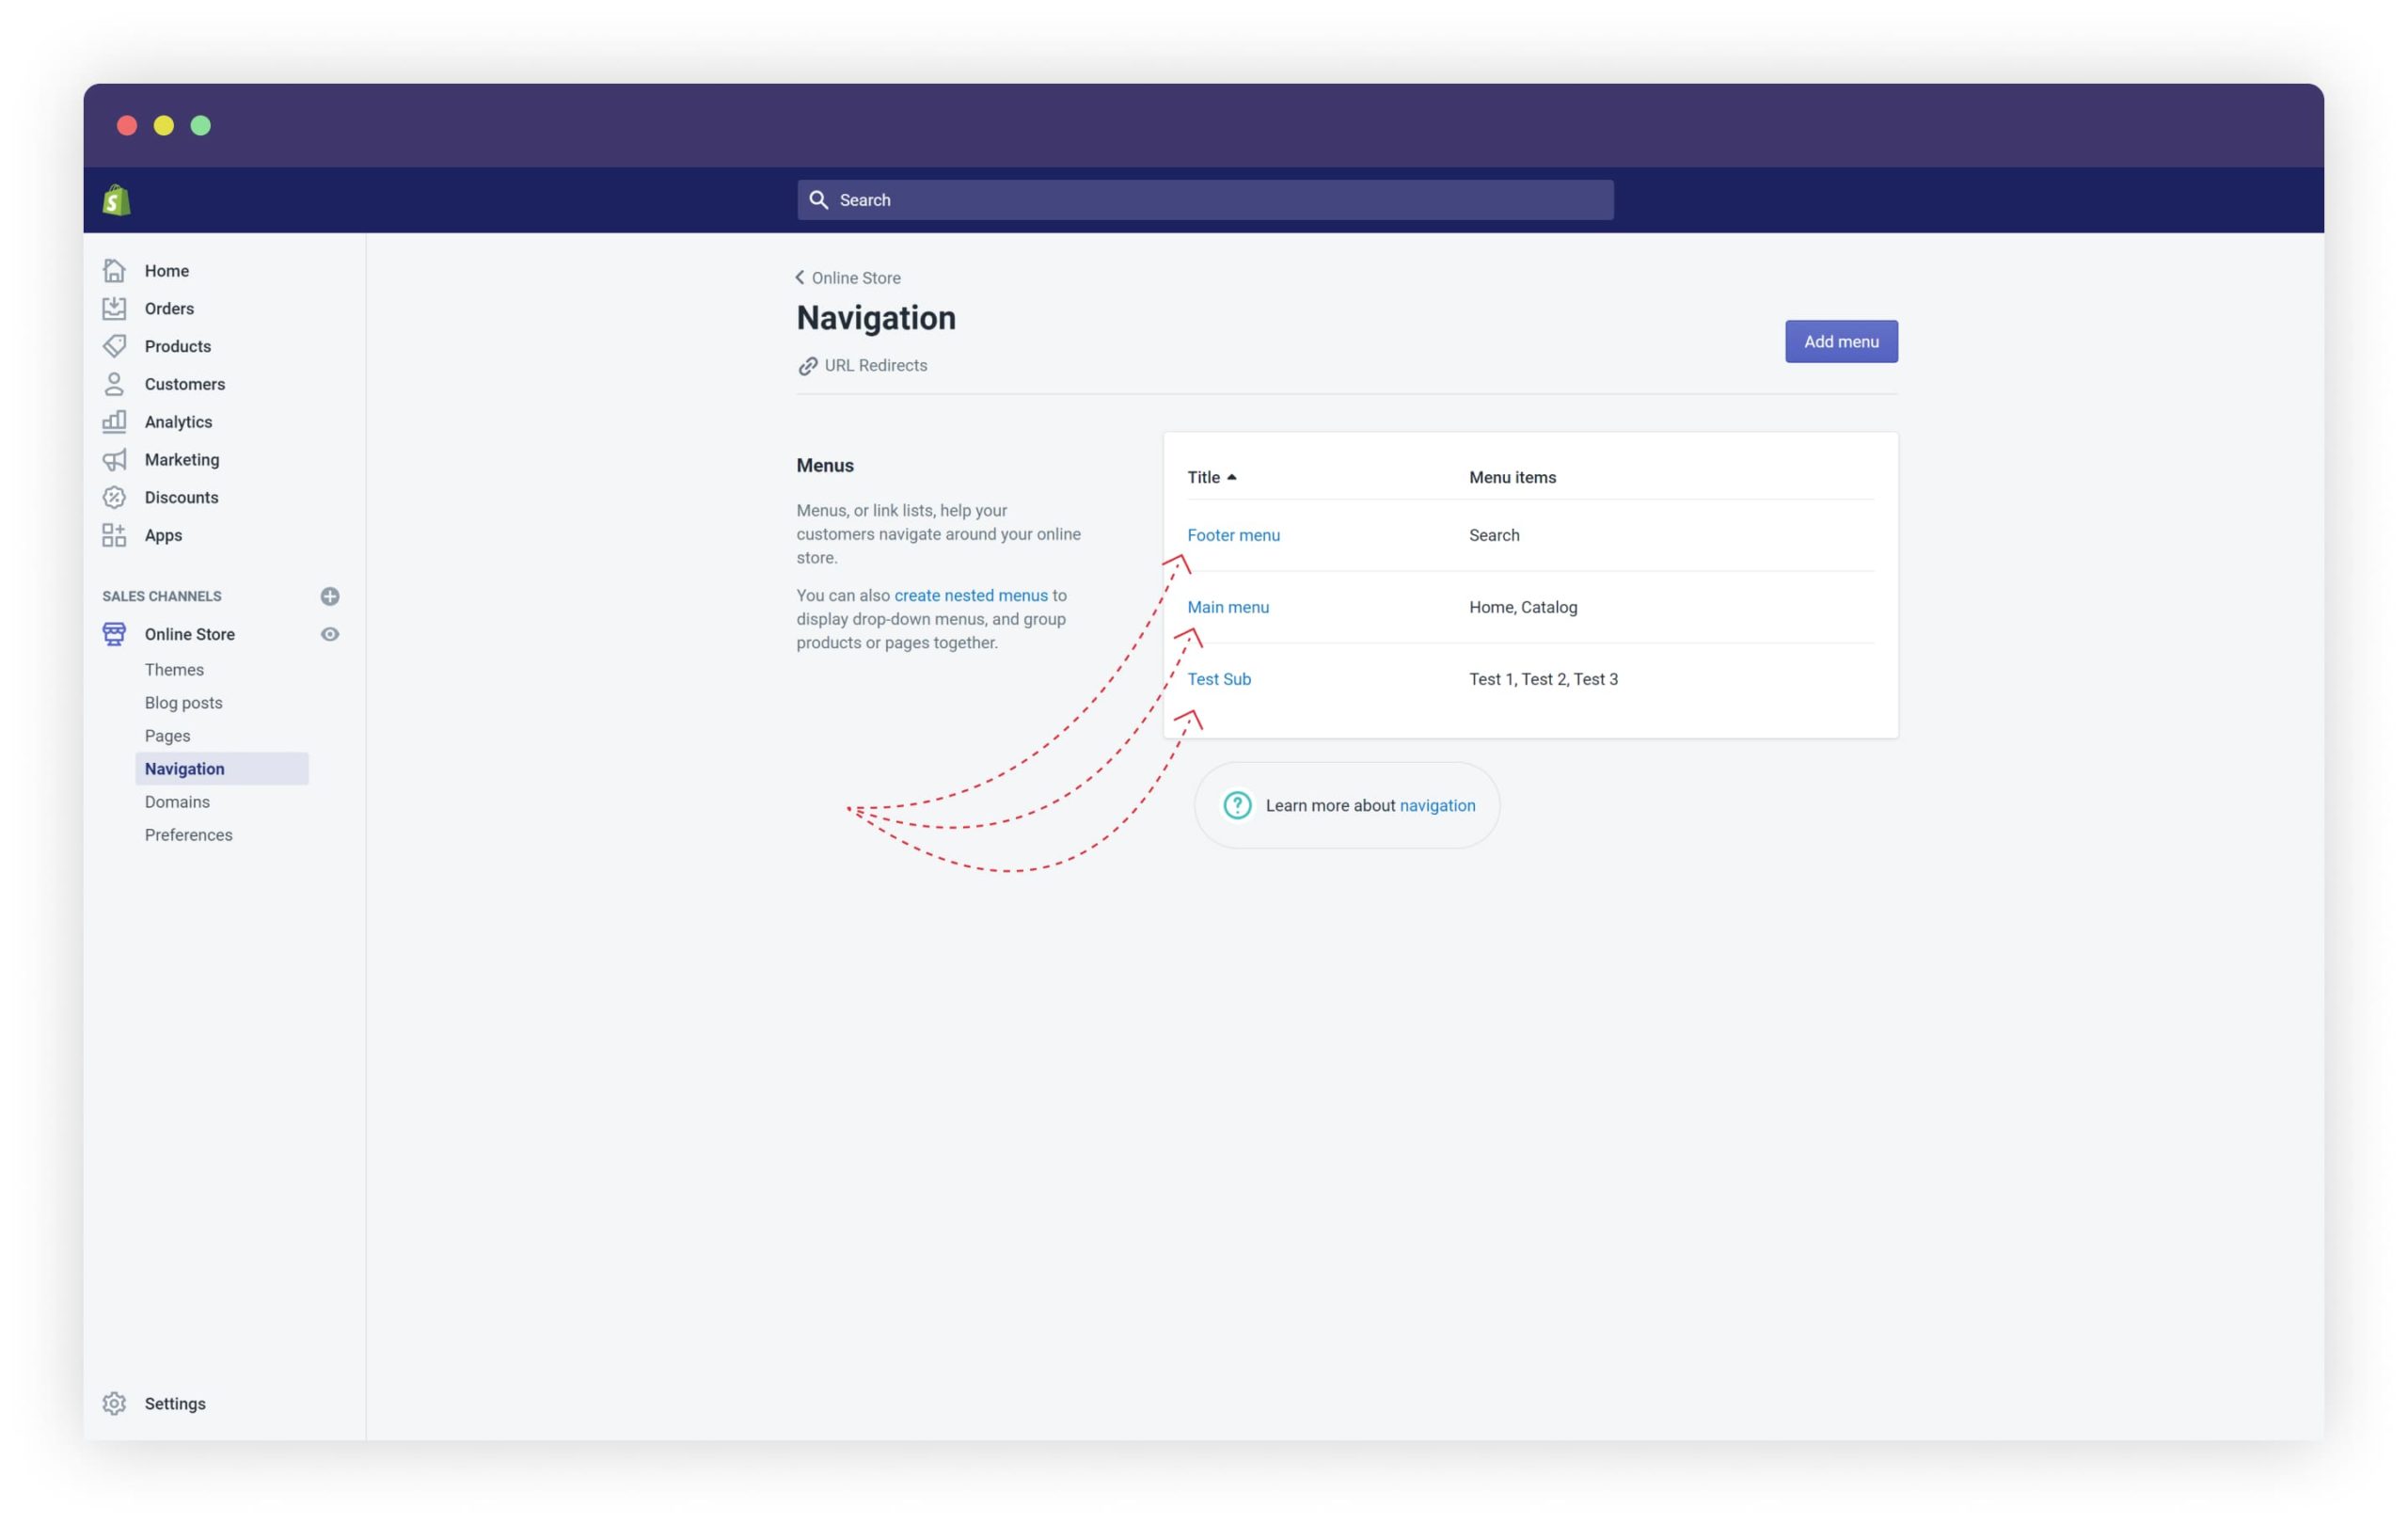
- Click on the ‘Navigation’ section.
- If you have already created the menu option, you can edit it. All you need to do in this case is click on it and go to the menu editing page.
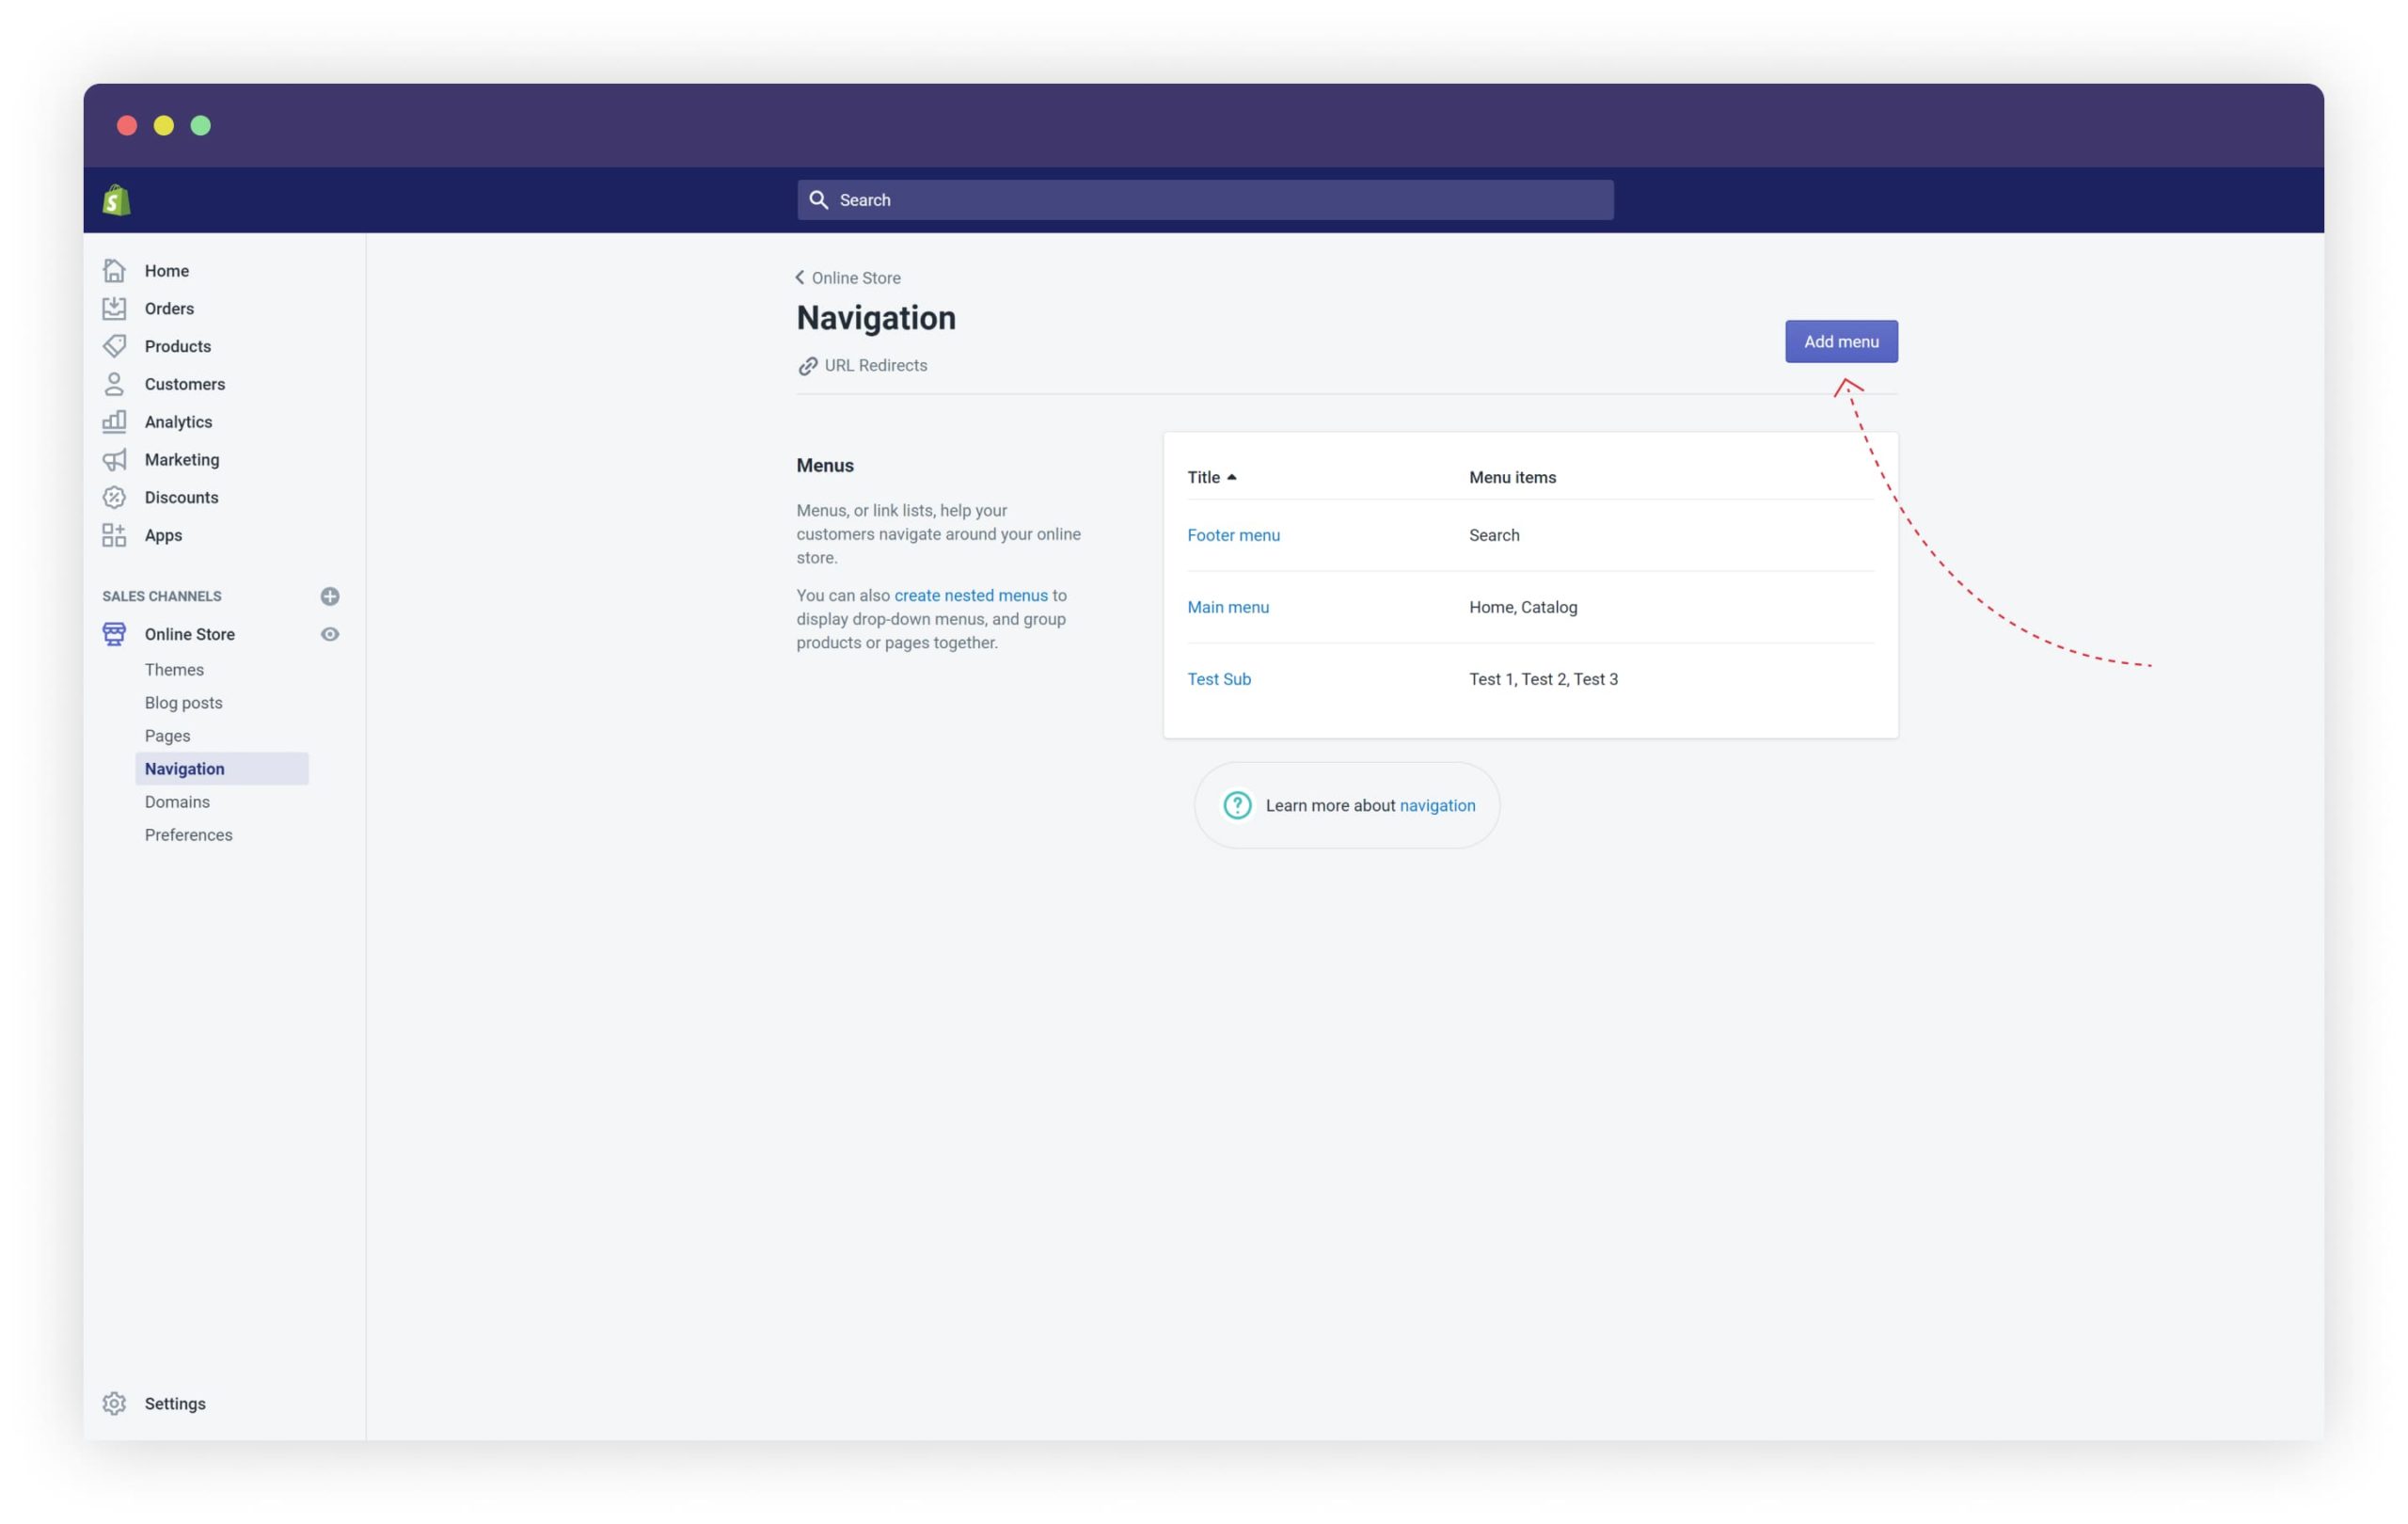
- If you don’t yet have the main menu, your first step is to create it. To do this, you need to click on ‘Add menu.’

- The next thing you need to do is add menu collections. You can achieve this by clicking ‘Add menu item’ and choosing the needed collection. This will become the parent collection.
- You should then add the other collections that are planned as sub-collections to the menu.
- All you need to do next is simply drag the sub-collections with your mouse to nest them into parent collections.
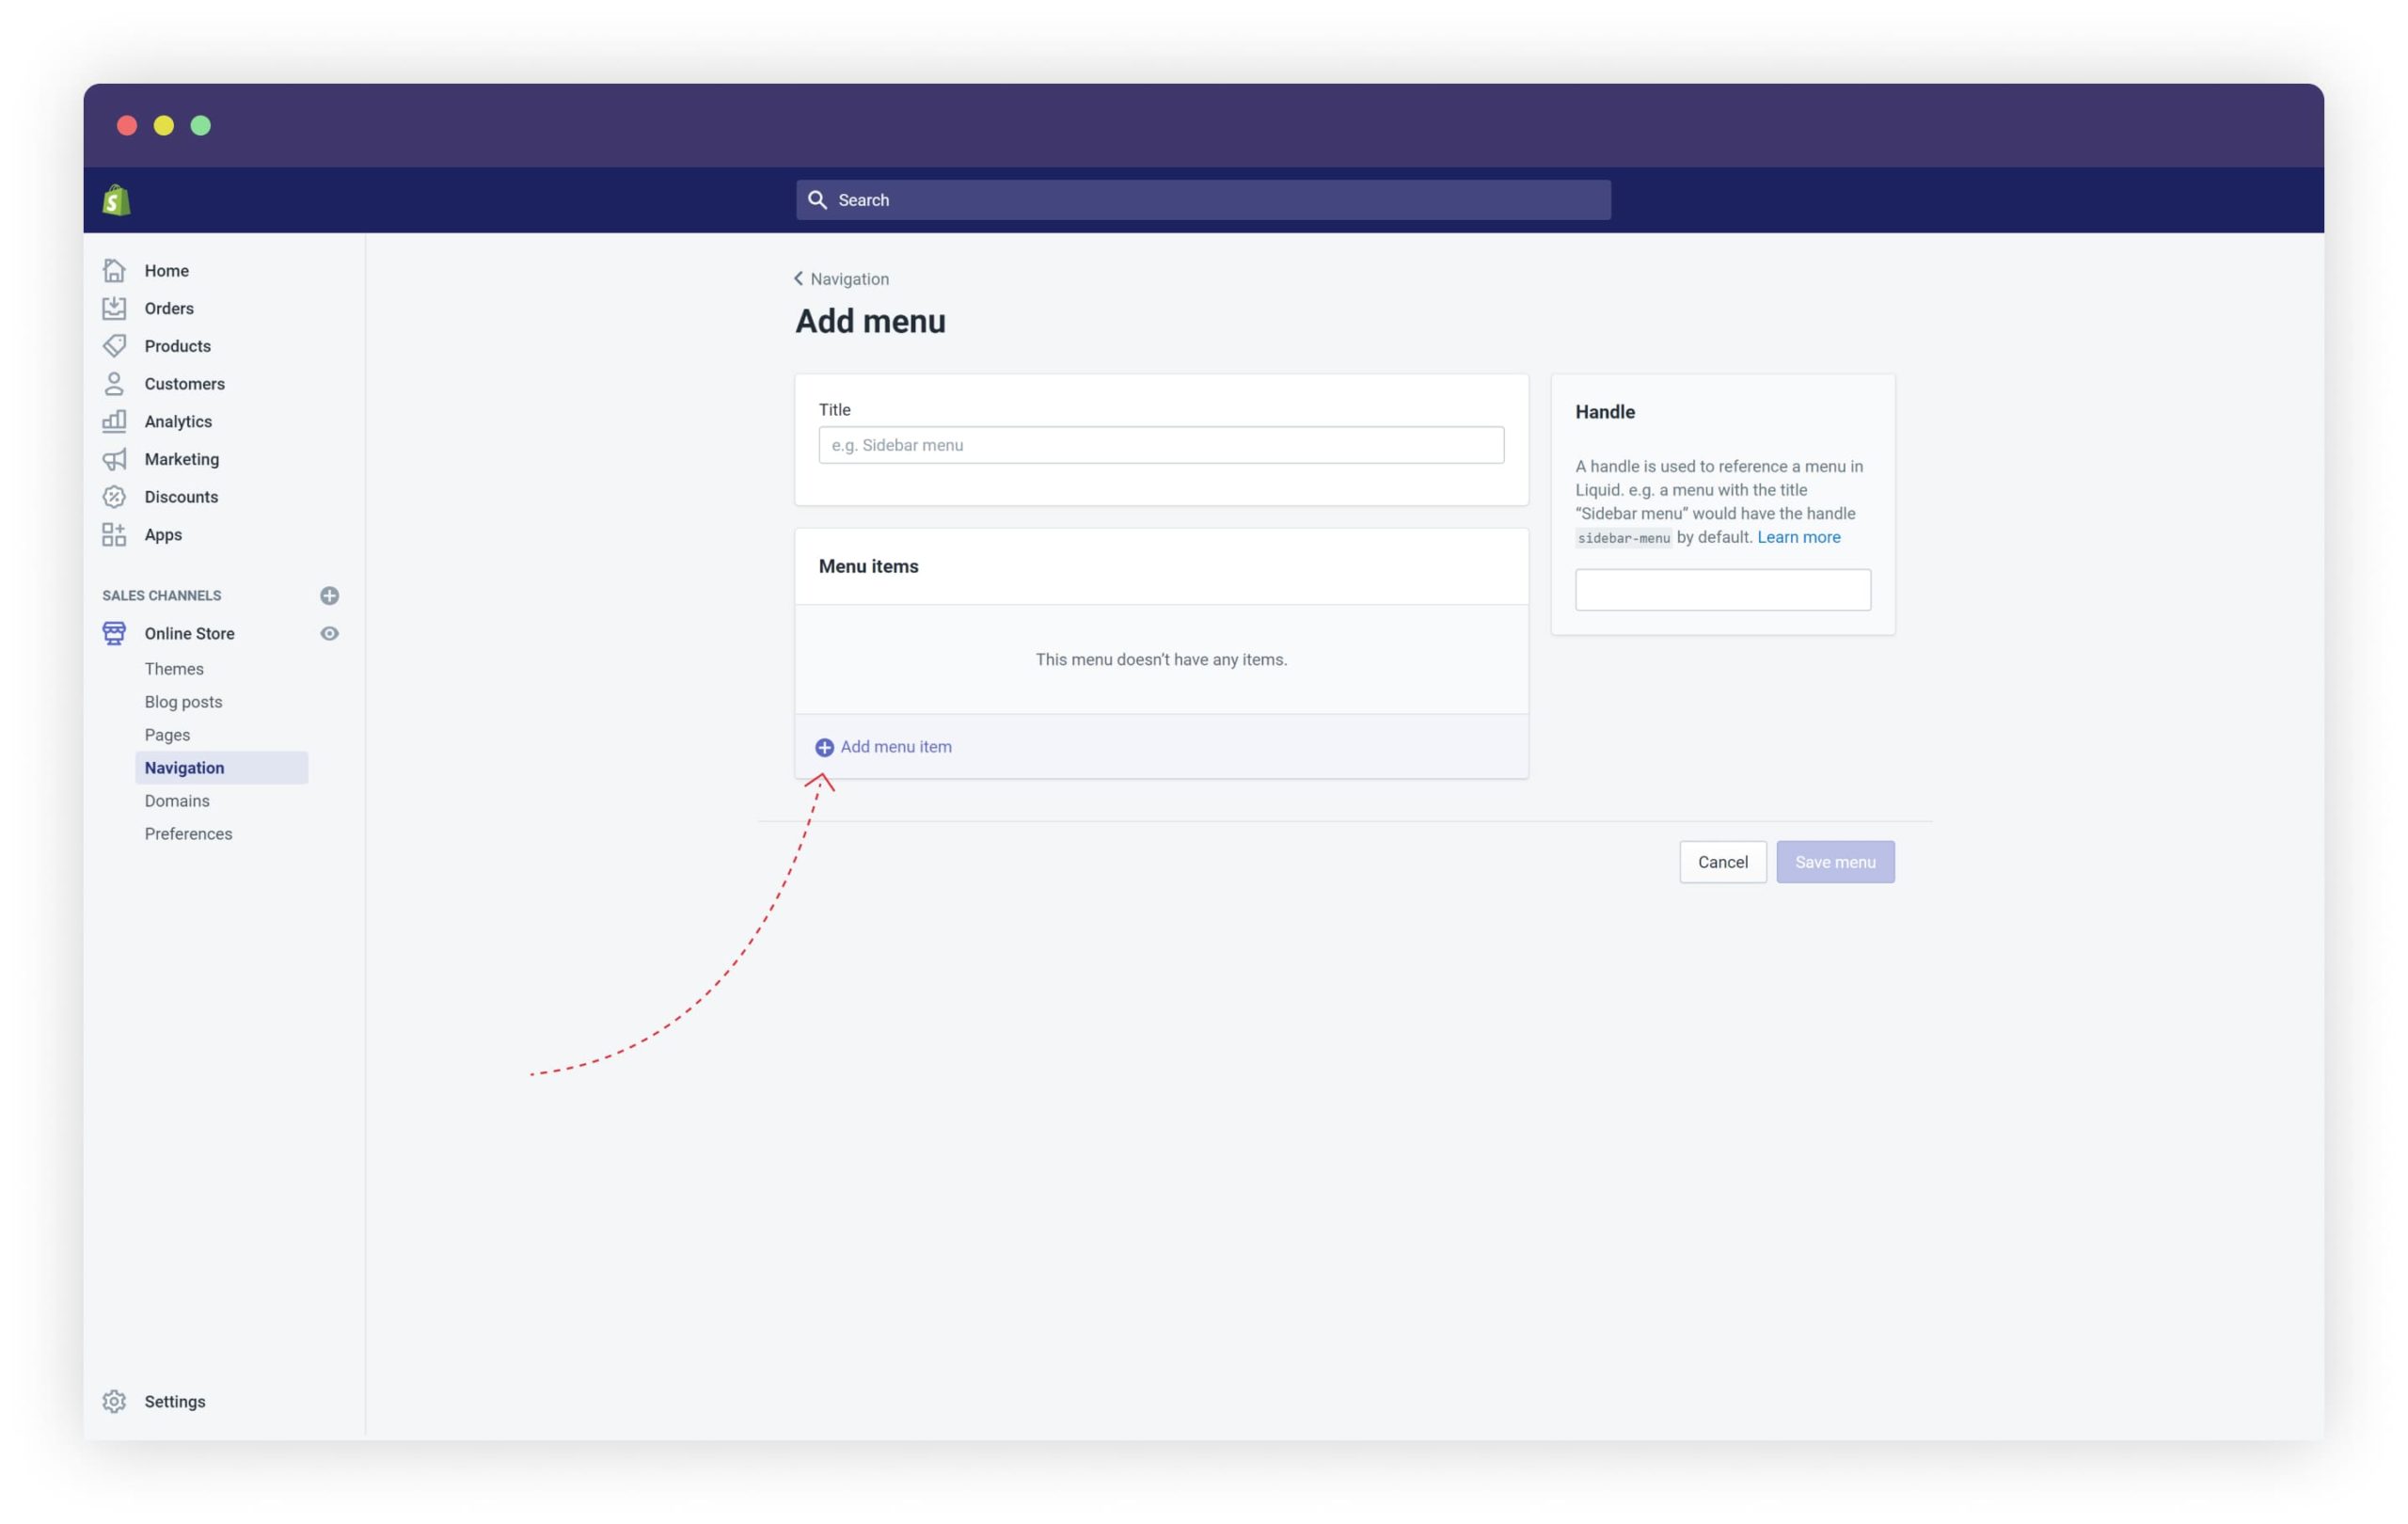
Step 3. Add menu item

Step 4. Add collections

Step 5. Drag the sub-collections
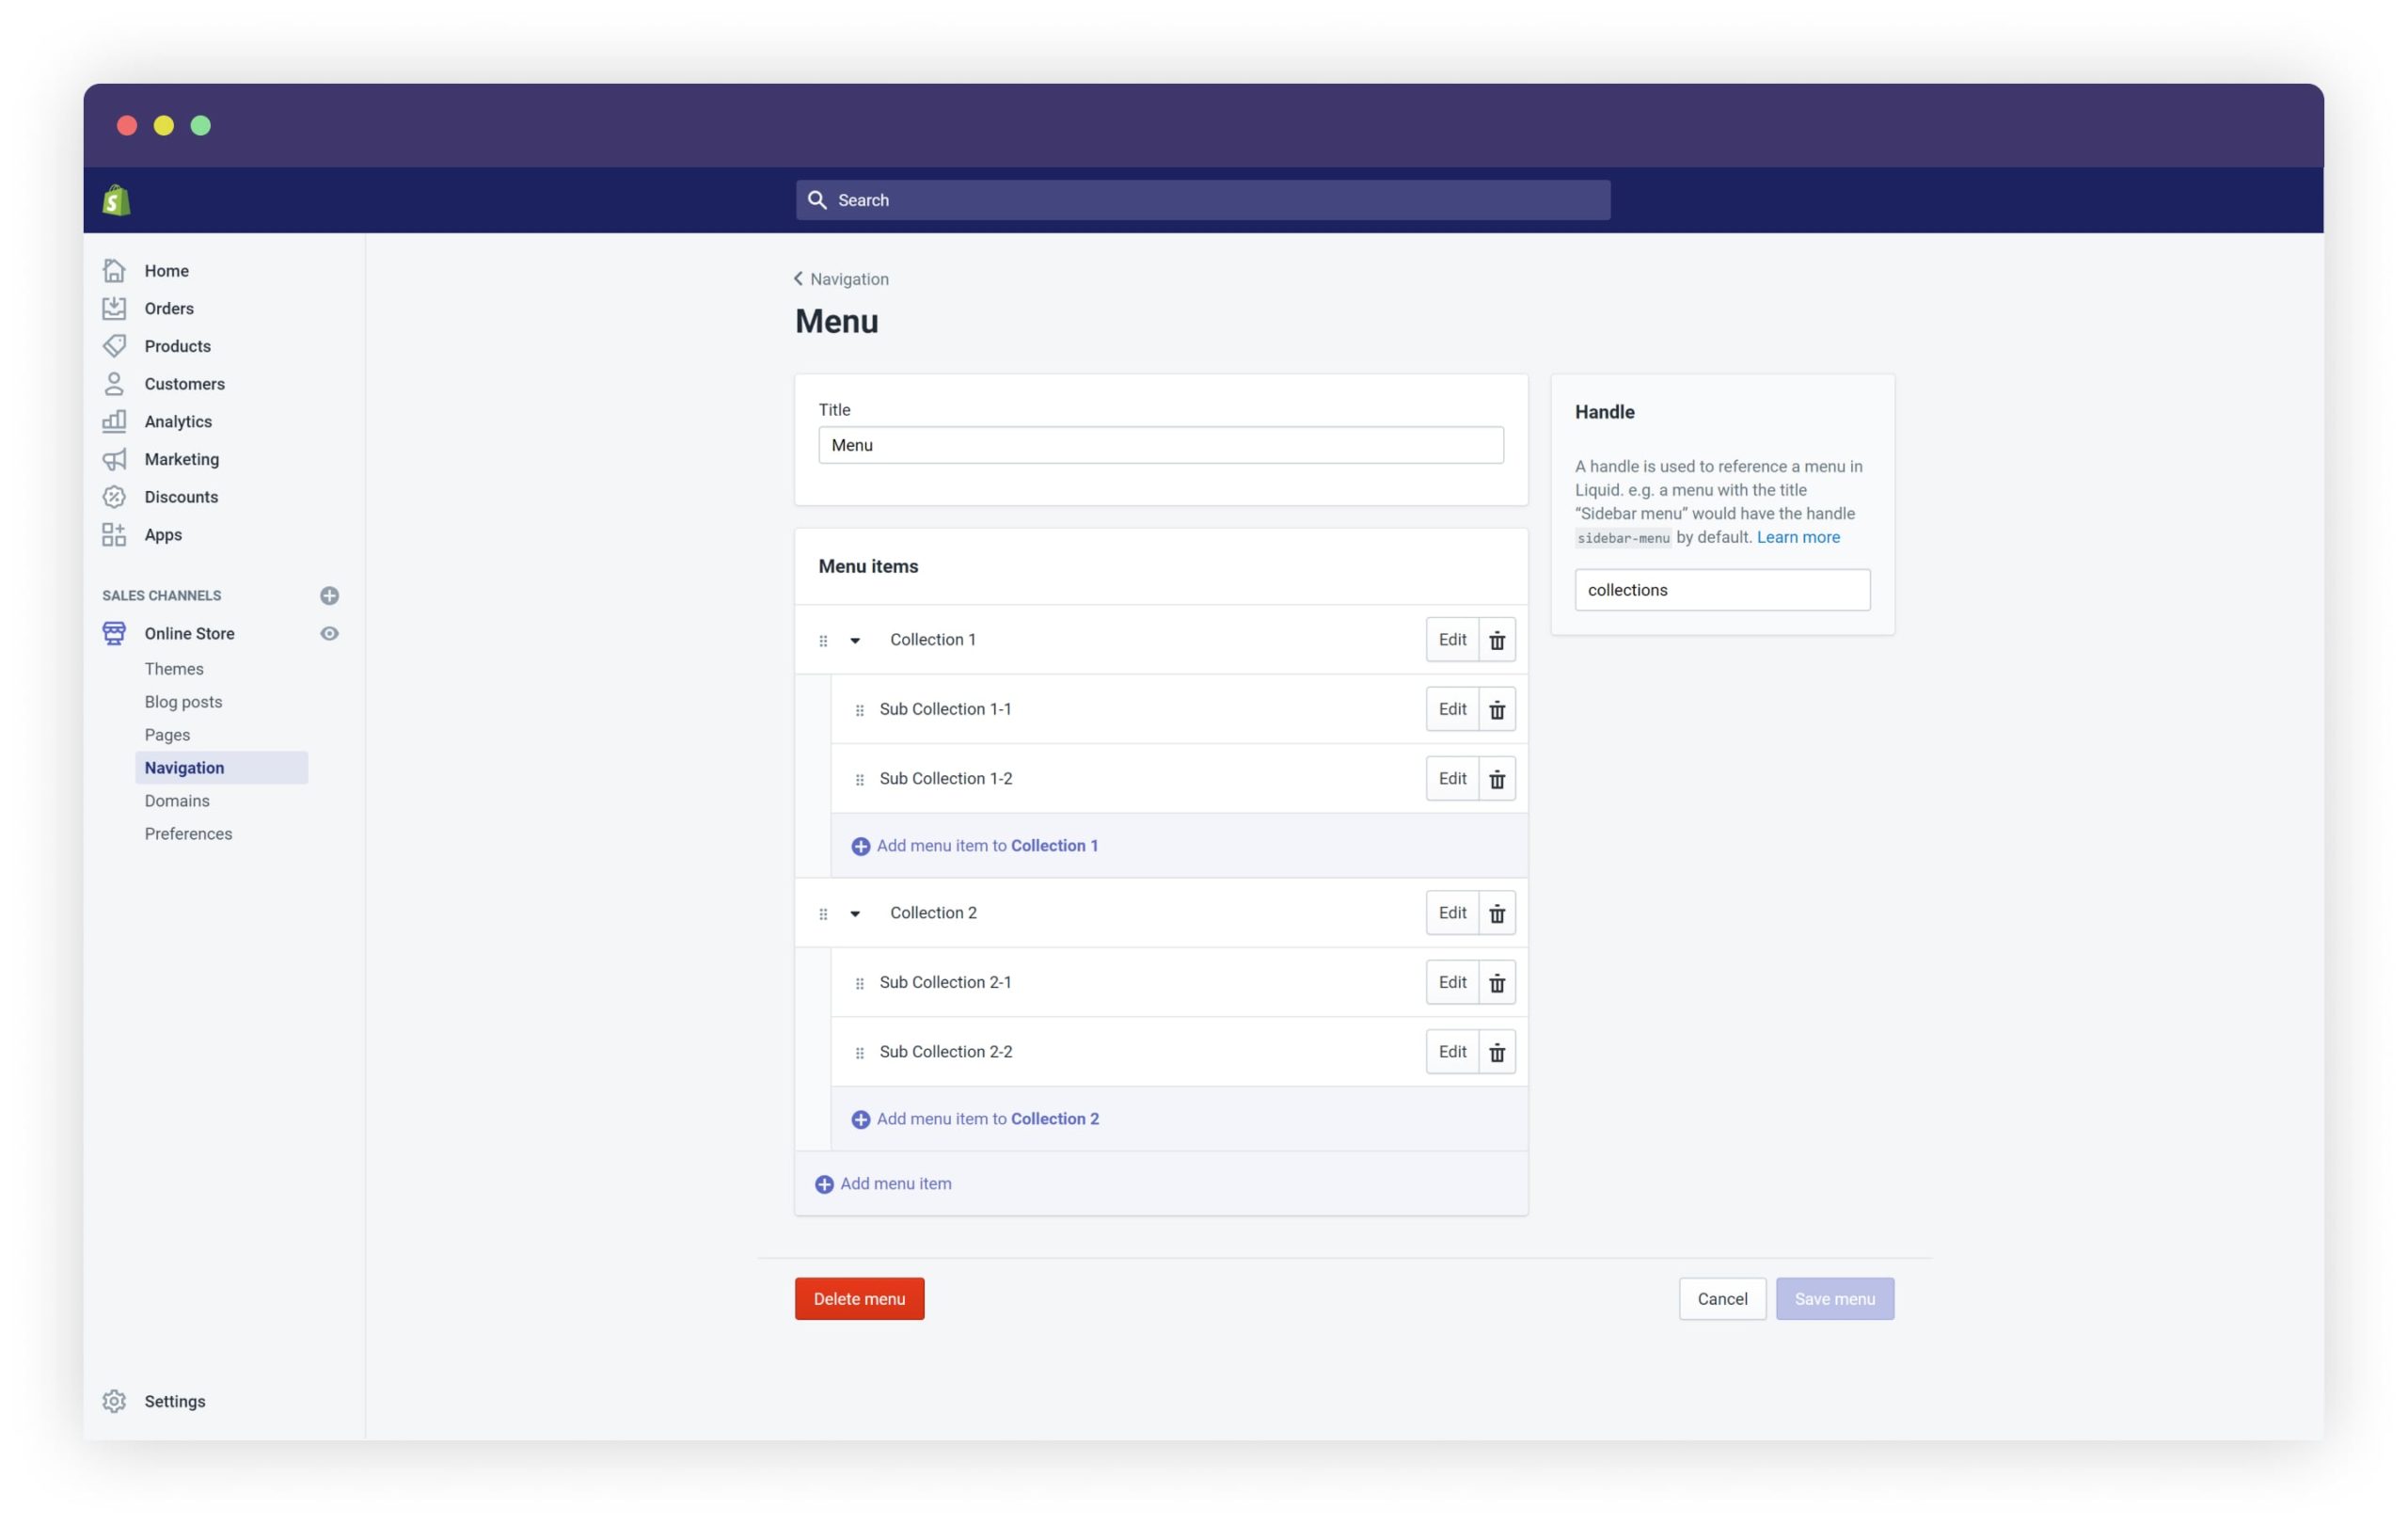
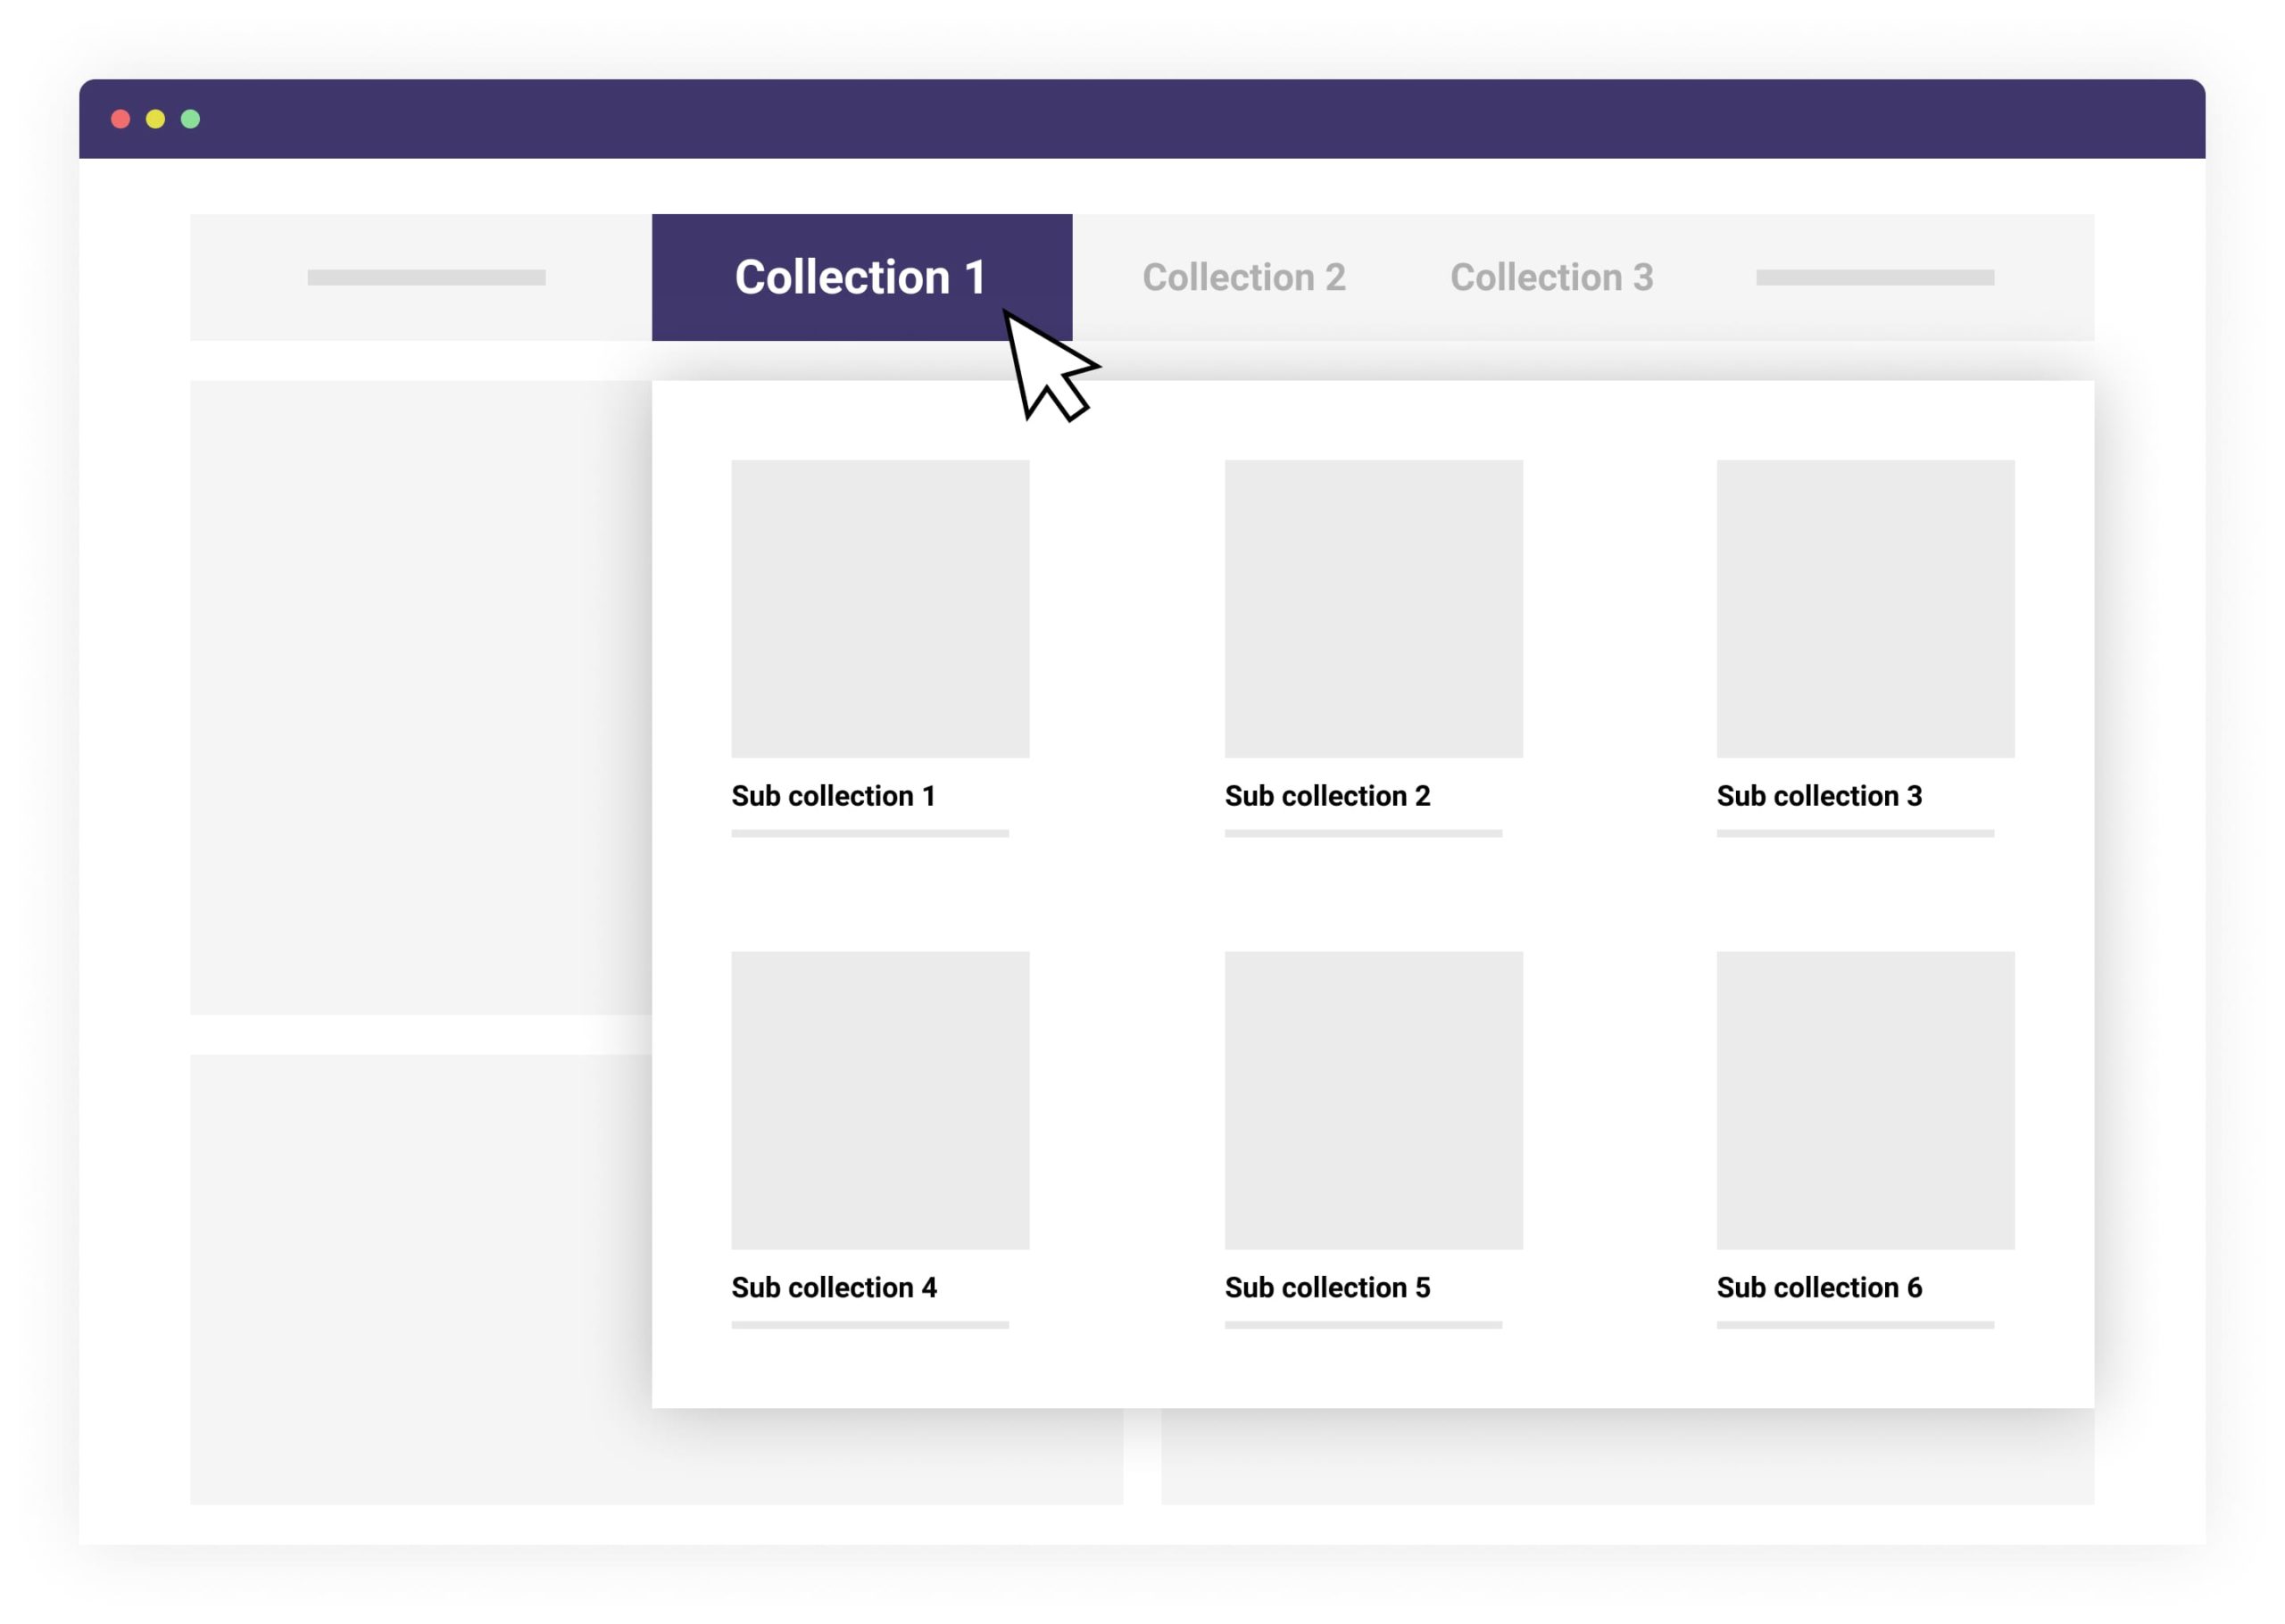
Step 6. Your sub-collections
By using this approach, you can quickly create a site structure that features sub-collections using the menu. One thing to note is that you don’t necessarily need to create a parent collection when using this method. You can simply create a menu item and nest the necessary collections there. At the same time, users won’t be able to click on the menu item and it will exist only to ensure convenient navigation of the site by users.
We should mention that the collections and sub-collections created using this method will have the same URL structure and appearance: https://your-store.myshopify.com/collections/your-collection
Adding Shopify Collections within Collections
In this section, we are going to find out how to add Shopify sub-collections within collections. There are two ways of creating sub-collections that differ slightly from what we have discussed previously. Such methods are more difficult to implement but they allow you to expand opportunities when it comes to creating sub-collections.
1. Creating the page and page.list-collection.liquid template.
2. Creating the collection.sub-collections.liquid template.
1st Option
Creating the page and page.list-collection.liquid template.
In this case, we need to create a separate page in the ‘Pages’ section that will perform the function of the parent collection.
To do this, it is necessary to take the following steps:
- You should create a page by strictly following the steps in the video.
- Next, add the template for the page.list-collection.liquid page.
- Create a menu in the ‘Navigation’ section using the provided method.
Add page
Create page.list-collection.liquid

Add Menu
Once you complete all the steps, you will have a specially created page that contains the chosen sub-collections. By implementing this method, you will have an opportunity to customize the actual page by adding images, changing its name, etc.
You can learn more information about this topic in the recommendations on the Shopify site: https://help.shopify.com/en/themes/customization/collections/featuring-collections-using-link-lists
Obviously, to achieve more extensive customization you will need to have at least a basic knowledge of HTML.
If you decide to implement this method, the URL structure of the sub-collections will look like this: https://your-store.myshopify.com/page/your-sub-collection
In contrast, the URL structure that you will get using the first method will look like the following: https://your-store.myshopify.com/collections/your-sub-collection
2nd Option
Creating the collection.sub-collections.liquid template
Before we provide details on how to realize this method, we need to mention that it requires some understanding of HTML.
To create collection.sub-collections.liquid, you need to go to the ‘Edit code’ section and click on ‘Add a new template.’ After this, you can create a new collection.sub-collections.liquid template. When this new file is created, you have to manually write code for the entire structure that will be realized on the site.
Here is the basic code that can be used as a starting point:
{{ collection.title }}
{% assign collection_handle = “collection-” | append: collection.handle %}
<ul>
{% for link in linklists[collection_handle].links %}
{% assign sub_collection = link.object %}
<li><a href=”{{ link.url }}”>{{ link.title }}</a></li>
{% endfor %}
</ul>
You can learn more information about which parameters can be implemented on the page in the official manual Shopify created by clicking on the following link: https://help.shopify.com/en/themes/liquid/objects/collection
By choosing this method of realization, the page URL will look like this:
https://your-store.myshopify.com/collections/sub-collection/name-sub-collection
The next step is to replace the standard (default) template of the collection with ‘collection.sub-collections’ in the settings of your template. If you do everything correctly, you will see that the chosen collection will be split into sub-collections.
Create your collection tree
To make sub-categories or sub-collections on Shopify, it’s better to create a simple hierarchy tree. This is pretty simple – point out your main collections, and then create the tree with your navigation link list.
To put it simply, you need to come up with and accurately visualize the structure of your site. You need to create a universal structure that takes into consideration the future development of your site. It’s important to remember that as your business grows and assortment of products expands, you will need to add new sub-collections to the existing main collections more than once.
This type of structure will be highly convenient for the visitors of your site. It will also help you to avoid creating duplicate pages that significantly affect your site ranking in search results.
The hierarchy tree may look like this:
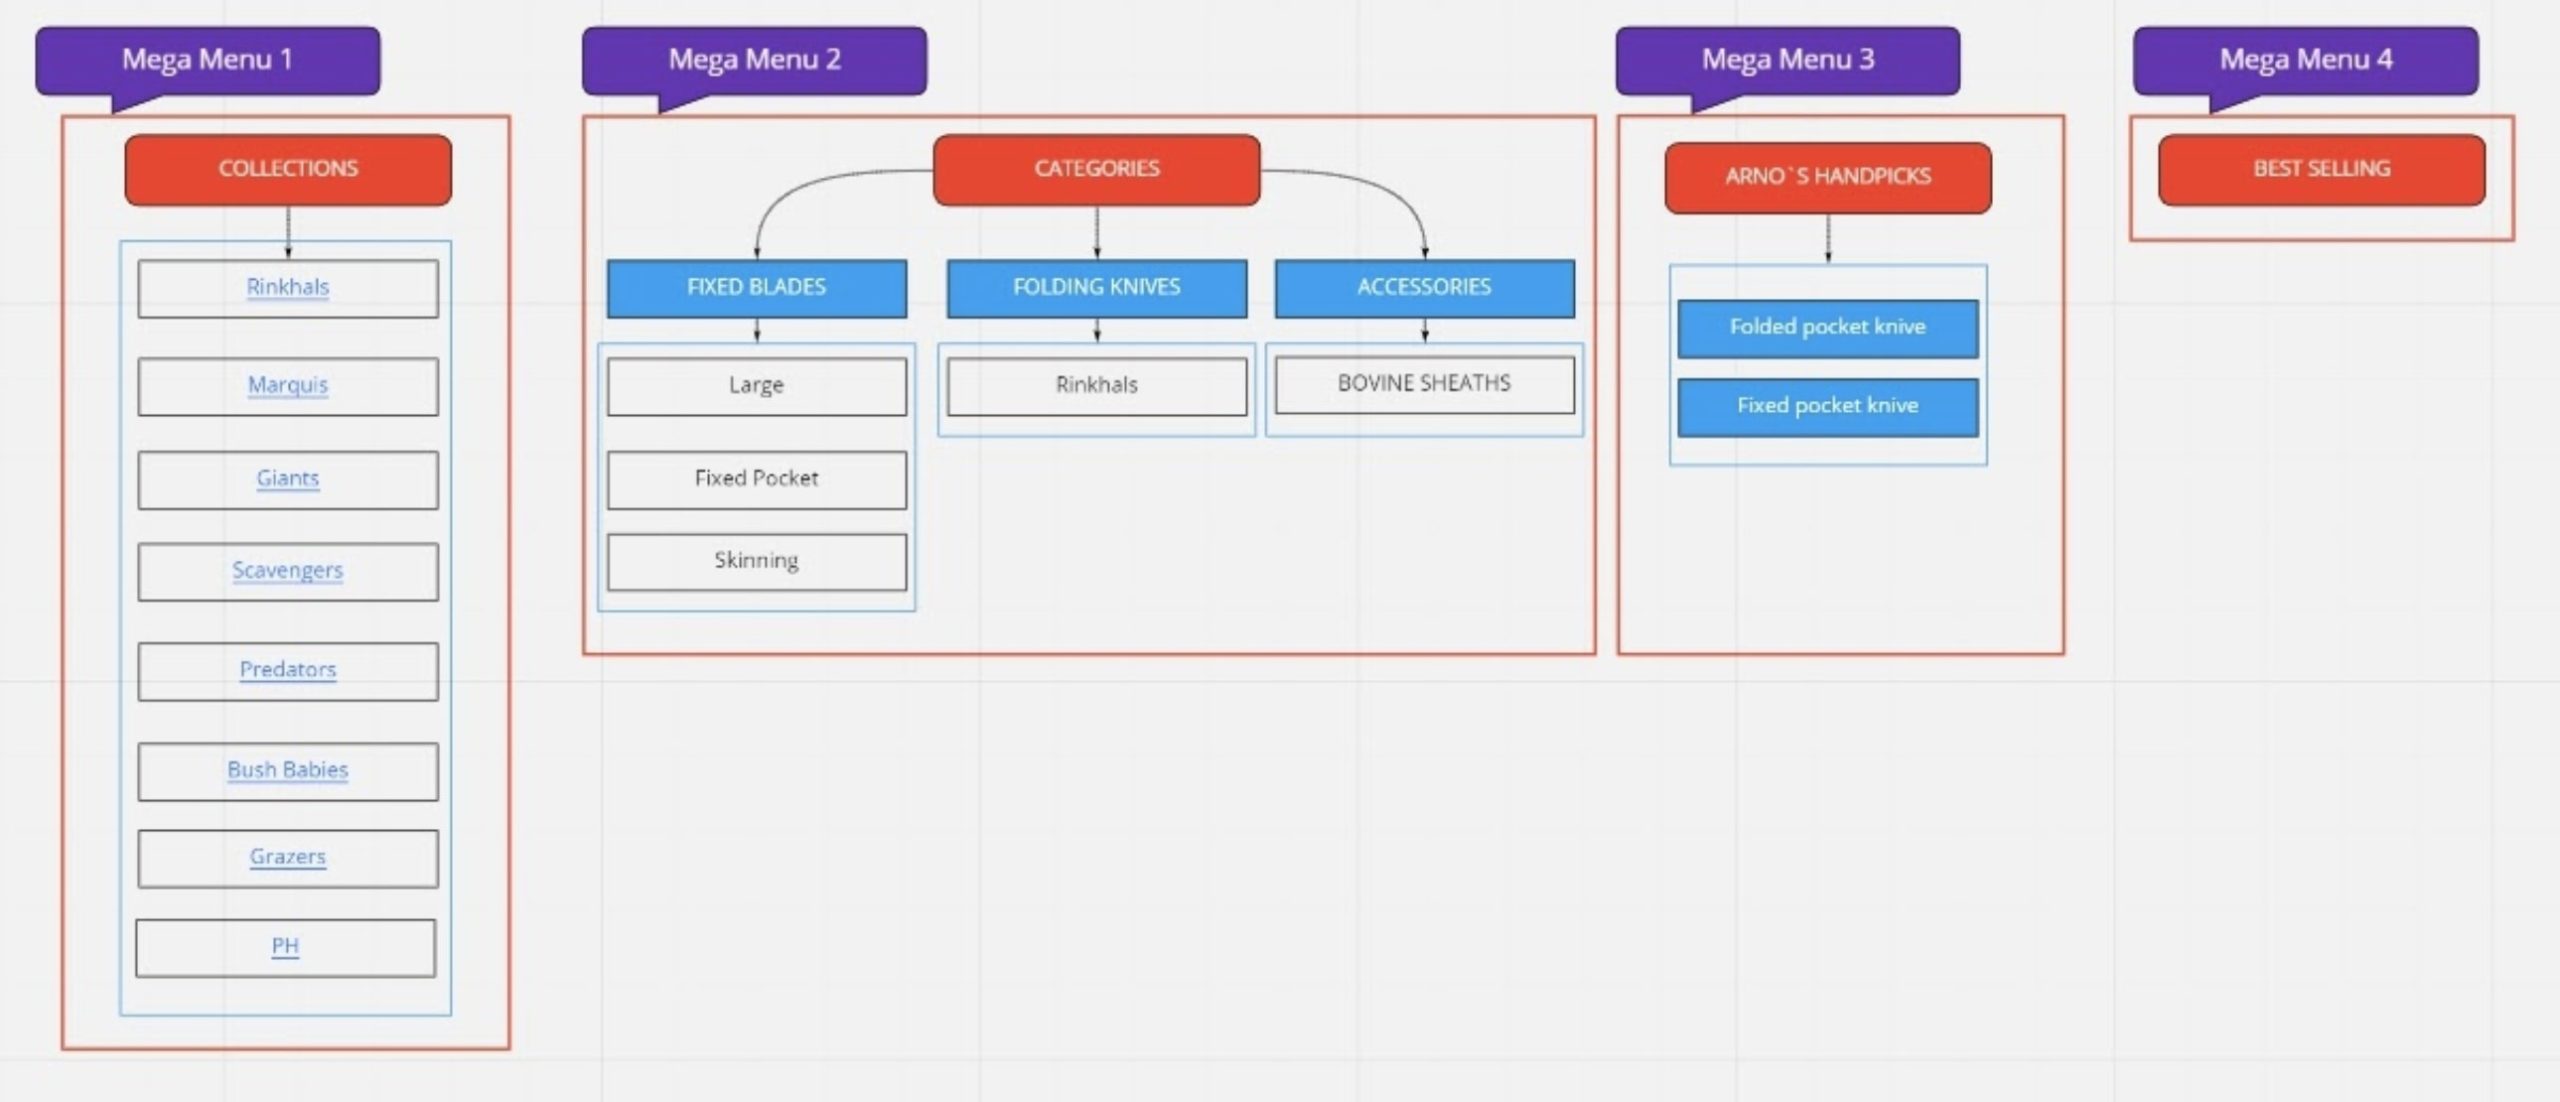
When creating new collections as well as sub-collections, don’t forget about the handle. It works as a parent collection, i.e. the main one. In our case, Clothes is your main collection.
You can create your sub-collections however you would like. There is nothing special about adding them, they are just standard collections. You can choose either to add products manually or by particular criteria.
As soon as you create the link list, add all your sub-collections to it. There aren’t any special rules on how to place or name sub-collections when you want to add more. Everything is up to you. You can order them and name however you like.
Sub-Collections Improve the Shopping Experience
The best reason to use sub-collections is that they improve the shopping experience for your customers. The more customers you have, the bigger profit you will earn. Moreover, you can add and manage sub-collections with a few clicks. All the settings are accessible from your Shopify Admin Panel.
To summarize, you have to go through several procedures to add sub-collections to your store. First, you have to create a link list, then a collection list page, and finally you can add sub-collections to your online store.
P.S.
We would highly appreciate it if you could leave a comment or share a link to this article on social media.
If you still have any questions after reading this article, please leave your question in the comment section below this post and we will gladly answer it.
Hello,
Could you please send me the code so i can copy and paste the above instructions.
i really appreciate the tutorial but writing the code is not my best talent.
thank you in advance
Hello, Nayef! We updated our article! Now you can learn more about different ways to create collections in your Shopify store, as well as copy the code to use it on your website.
Hi Nikolas! Great guide, thank you
What about the images of the sub collection, i cant make it work…
Hi Bernardo! Thanks for the comment. Please tell us in more detail what your problem is.
I am trying to do this.
Adding Shopify Collections within Collections
I made a page and tried to change the template suffix to page-list-collection but I do not have that option.
what to do in this situation ?
Hi, Peter. If there is no suffix in the list, then there is no such template. First, make sure you don’t miss any of the previous items in the instructions. If that’s okay, check, maybe you created the wrong template. By default, this is an article type. You need to create for the page type: Create a new template for page type.
Why is such a basic functionality so difficult to implement? I don’t understand. This seems like a total no brainer that would increase conversions.
Hi! Just creating a collection is not a problem. But if you need a certain URL structure, then yes, you to go deeper into the code. And this is really a cms omission. But on the other hand, in comparison with other platforms in Shopify there are not so many must-have tasks that you cannot implement without the help of a developer.
Hi Nikolas, thank you so much for sharing the informative article.